A tattoo machine sample is the proposed production standard, not a showroom piece. A clean finish may look convincing during a short inspection. It reveals nothing about voltage drift after two hours or a grip that slowly works loose. Tattoo machine sample testing exposes those risks before hundreds of units are built.
Why Tattoo Machine Sample Testing Matters Before Mass Production
Sample approval commits the buyer to future warranty claims and the reputation printed on the housing. A small fault becomes expensive at scale. One battery indicator that drops from 40% to zero is annoying. The same behavior across 500 machines creates returns and support tickets. Test limits must reflect the customer and sales market. A training pen and a daily-use professional machine need different limits.
Define Your Product Requirements Before Testing the Sample
Testing without a specification becomes a debate about feel. Put the intended use and measurable limits on paper. For an OEM/ODM tattoo equipment project, keep that document tied to the quotation and approved design revision.
Confirm the Intended Tattooing Applications
State whether the machine is meant for lining or shading. It may instead target color packing or fine-line work. Some models support mixed use. Name the expected user. A traveling artist may prioritize battery redundancy. A studio professional may care more about heat and balance. Intended use controls the cartridges and stroke settings. It also sets the test duration.
Create Measurable Acceptance Criteria
Record stroke length and voltage range. Add the motor type and weight. Battery rating and charging time also need limits. Dimensions and materials must match the drawing. Check the included accessories. Add tolerances where variation matters. Keep subjective notes, but never let “feels powerful” replace a voltage reading or timed run.
Inspect the Machine’s Appearance and Build Quality
Begin with the machine unpowered. Assembly is easier to judge before motor noise and display functions take attention away.
Use a visual and physical inspection checklist:
- Compare housing color and finish with the reference.
- Check for scratches and uneven gaps. Look for sharp edges.
- Verify logo position and print durability.
- Press every button. Inspect display alignment.
- Rotate the grip through its full range.
- Fit the specified tattoo cartridge needles and check for wobble.
- Inspect the charging port and battery joint.
- Listen for loose internal parts.
Photograph defects beside a ruler. “The gap is too large” causes arguments. “The gap measures 0.8 mm against a 0.3 mm limit” gives the factory a correctable target.
Test the Tattoo Machine’s Performance
Use the agreed battery and cartridges. Stay within the specified operating range. Record the conditions so final inspection can repeat them.
Motor and Power Stability
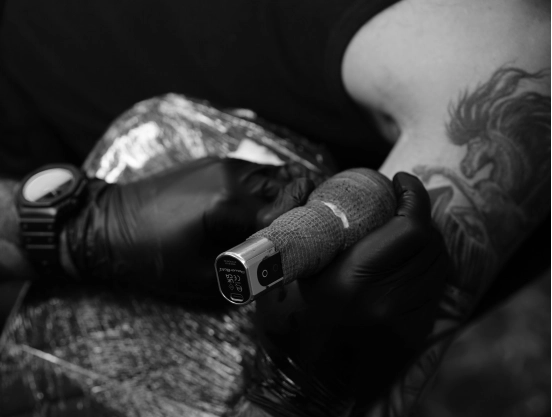
Start the machine at several voltage settings. Watch for delayed startup or display fluctuation. Listen for clicking and changes in pitch. Apply a representative load. Repeat readings when the machine is warm. Sudden changes may point to connection resistance. Battery control behavior or motor variation may also be responsible.
Stroke and Needle Performance
Verify fixed stroke or every adjustable position. The selector must stay in position during operation. Check needle depth across the grip range. Use market-relevant cartridges. A wireless tattoo machine that works with a small liner may feel weak with a larger magnum. The motor setup or product claim may need correction.
Vibration, Noise, and Heat
Run the sample at low and high settings. Note vibration at the grip and battery joint. Investigate any new rattle after warm-up. Measure housing temperature at fixed intervals. Touch can flag discomfort, but a reading is better evidence. Stop if heat rises rapidly.
Battery Performance
Time a full cycle under a repeatable load. Check charging duration and indicator accuracy. Observe performance below 20% charge. Some designs show remaining capacity after delivered power has fallen. Repeat the charge test. For a two-battery package, compare both packs. A large difference can reveal cell or battery-management inconsistency.
Evaluate the Sample in a Real Tattooing Workflow
Bench results cannot show behavior through glove changes or a long shading pass. Give the sample to qualified artists using suitable practice material. Record balance and grip comfort on the same form. Include cartridge changes and display visibility. Note the cleaning workflow too. One artist may dislike a thick grip. Three reporting that it rotates during use signals a design issue. Engineering needs repeatable observations, not a vote on whether the machine feels premium.
Run Basic Reliability and Durability Tests
A sample does not need months of field use to expose basic weakness. Run repeated start-stop cycles. Operate it for the agreed session length. Cycle the battery. Work the buttons and grip. Exercise the stroke mechanism. Insert and remove cartridges repeatedly. Check retention and screws afterward. Inspect the joints. Use a controlled handling test for the shipping carton. Log any loosening or overheating. Record power loss and new noise. Workshop checks do not replace required laboratory testing.
Review Safety, Compliance, Packaging, and Documentation
Match reports and declarations to the exact model and destination market. Generic certificate folders are not enough. Review battery specifications and transport documents. Check the manual for ratings and warnings. Verify model identification and language. Retail claims must match the tested configuration. Packaging must support the grip and battery during shipping. Also define how quality inspection and after-sales support will handle defects found after delivery.
Record Revisions and Establish a Golden Sample
Classify each finding as critical, major or minor. Send photographs and readings. Include drawing references. Safety or performance changes require a revised sample. So do material or construction changes. “Please improve quality” does not close an issue. When the sample passes, sign its specification. Seal one unit as the golden sample and record its serial number. The purchase order and QC plan should require production to match it.
Decide Whether to Approve, Revise, or Reject the Sample
- Approve: Critical requirements pass. Any remaining variation is documented and acceptable.
- Revise: The concept works, but defined corrections must be verified on another sample.
- Reject: Safety concerns or unstable performance remain. Specifications are false or defects remain unresolved.
Production should not start on verbal approval. Both parties need the same signed revision and the same acceptance criteria.
Conclusion: Move From a Tested Sample to Reliable Production
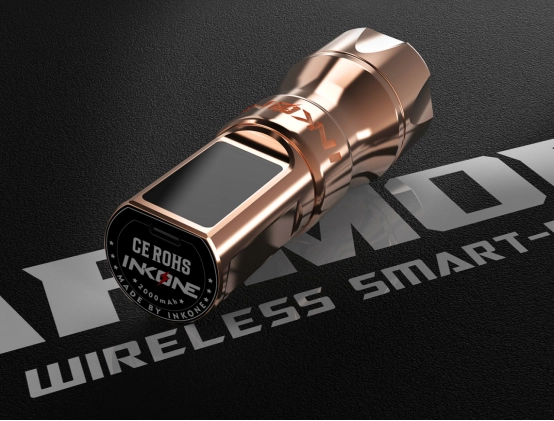
A tested sample separates an attractive prototype from a scalable product. INKONE can carry that baseline through production inspection and branded packaging. Buyers can discuss a custom tattoo machine project and request sample support against defined specifications.
Frequently Asked Questions
Q: How many tattoo machine samples should be tested?
One sample can confirm design direction. Two or three reveal assembly and component variation more reliably.
Q: How long should a tattoo machine sample test take?
Allow several full operating and charging cycles. Practical testing may take days. Laboratory work extends the schedule.
Q: Can mass production begin while sample revisions are still open?
It can, but risk rises quickly. Close performance or construction changes before committing production materials.
Q: What is a golden sample?
It is the signed final sample used as the physical quality reference for mass production and pre-shipment inspection.